Let’s start using ACRCms
Introduction
Creating a website with ACRCms is easy and painless. In this tutorial, you will learn how to:
Log In
Visit the url yourwebpage/login, a login mask will appear. After the installation the default credentials are:
User: manager
Password: managepass
When you are logged in, at top of the page appears the topbar and over every content appears an edit bar. If the edit bars bother you, you can disable them clicking on TOGGLE EDIT BARS.
Insert your first content
The easiest way to add a custom content to the page is the html slice. Click on ADD SLICE in the top bar, and then on HTML.
The html edit box will appear. For now the only field that interests us is the rick WYSIWYG editor, let’s write something interesting:
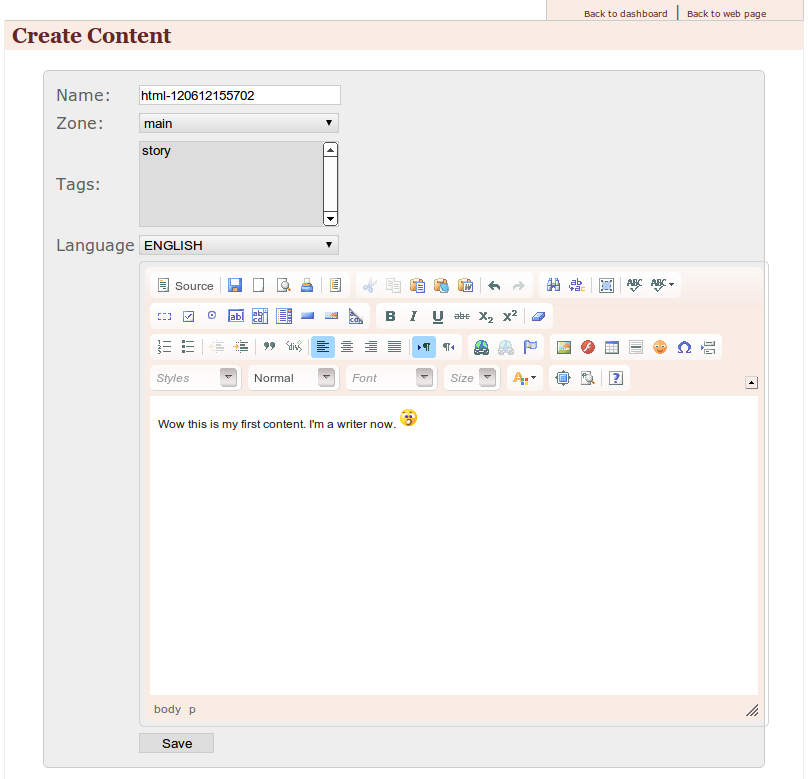
save it and take a look to the web page. The content is there. Simple, isn’t it?
Edit a content
Editing a content is as simple as inserting a new one, just click the edit button in the edit bar over the content you want to modify. As you can see, is now appeared the versions box. What the hell is that? Well, it’s one of the most powerful features of ACRCms: every time you edit a content, the previous version remains stored in the database and you can roll it back whenever you want. Ok, so, click on edit in the versions and translations box, edit a content and then save it. And, then try to click on revert on a previous version. It’s magic™.
Add a cool image
Add an image slice (ADD SLICE -> IMAGE). The box that appears is the ACRCms asset chooser.
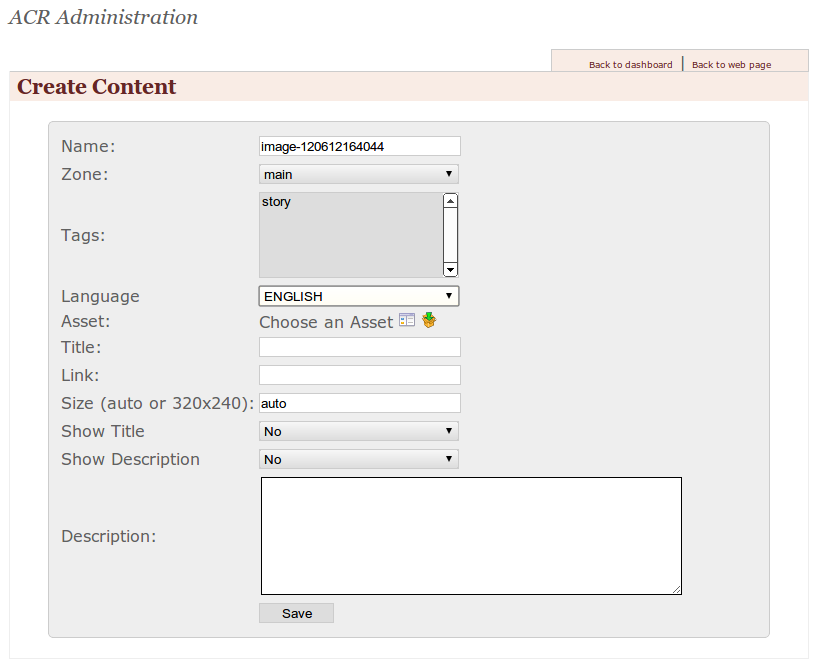
the usage is pretty simple, just select an already uploaded asset from the assets browser, or upload a new image, return to the asset chooser and select it.
Fill the title field, insert a web link if want to open a new web page on image click, insert a specific dimension (auto will preserve the actual image size) and provide a description (facoltative).
Save the slice, and your image is displayed on the bottom of the page.
Insert a community driven comments thread
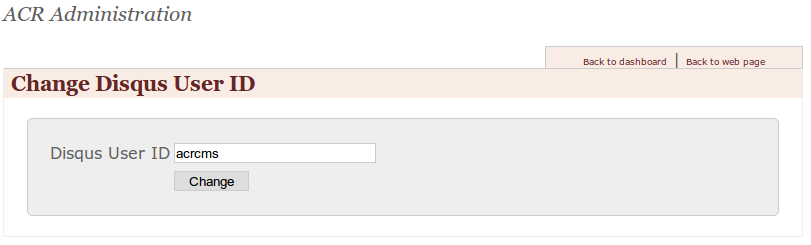
Ready to face the community? So you can add a comment thread, provided by the disqus plugin. A preliminary step is required only the first time you add a comment thread: register yourself to disqus.com, from the disqus dashboard, add a website, fill the url of your ACRCms website and add the site name. Return back to ACRCms, click on ADMIN in the topbar, and
then click on Disqus icon (general setting panel). Insert the website name in the User ID field and click change.
Now return back to your site page, click on ADD SLICE -> DISQUS THREAD, don’t change any field and click save. Ok you have your comments thread.
Create a new page
When your site has grown up, you need a new page to accomodate your contents. It’s a trivial task: click on ADMIN -> CREATE PAGE.
On the page create box, you have to select the page parent. Just remember a couple of things:
- if you select
-----------as parent, the page will be on the root of the website - if you select
Default page for global layoutas parent, the page will be hidden - Any other choice as parent, the page will be a child of the page selected
For this tutorial, we are going to select ------------, insert test as title and url and save. You will be redirected to the newly created page
and a new menu entry for that page is automagically added on the top menu.
Add a fully functional search bar
Almost any content-centric website needs a search bar. In ACRCms is simple to add one, click on ADD SLICE -> SEARCH, save and the search bar will be placed in your page.
Add a breadcrumb bar
Using Genshi slices, you can create contents with more logic. We are going to create a breadcrumb bar using a Genshi slice:
click on ADD SLICE -> GENSHI, insert this content:
<?python
nodes = []
curpage = page
while curpage:
if curpage.slices:
nodes.append(curpage)
curpage = curpage.parent
nodes = list(reversed(nodes))
?>
<div class="breadcrumb">
<span class="breadcrumb_home">
<a href="/">HOME</a> >
</span>
<span py:for="bcpage in nodes[:-1]">
<a href="${bcpage.url}">${Markup(bcpage.i18n_title)}</a> >
</span>
<span>${Markup(page.i18n_title)}</span>
</div>
Save it and you have a breadcrumb bar. For details please read Genshi Slice Reference.
Add a contact form
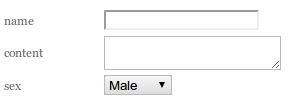
Add a new form slice ADD SLICE -> FORM, fill the destination email address and the email subject, then in the fields text box insert fields description:
Name=text
Content=textarea
Sex=[Male, Female]
click submit and you will have a form like this: